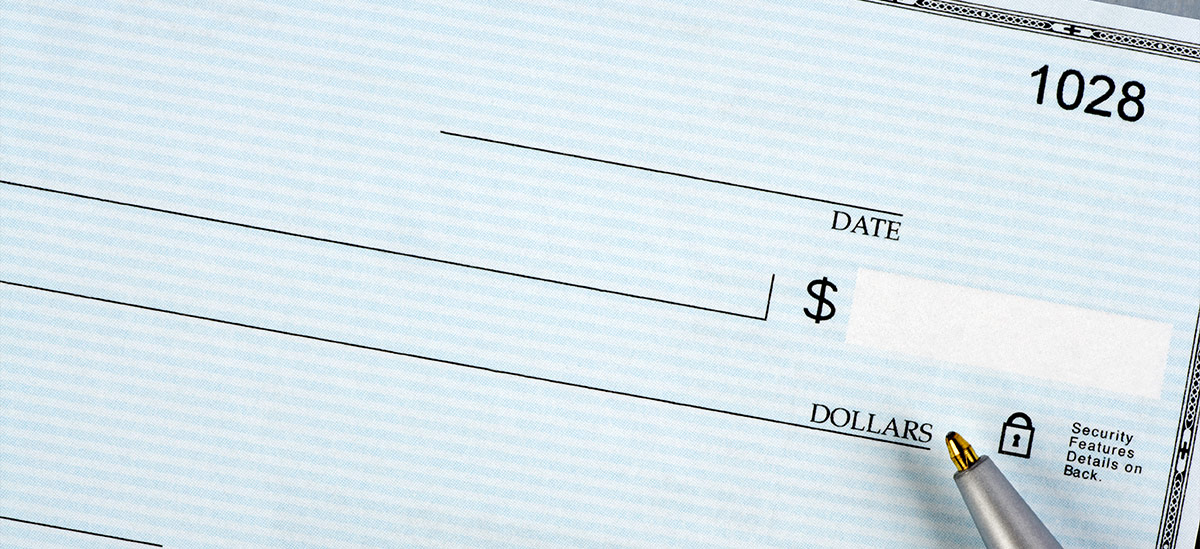
Need to write a check but aren’t quite sure where to start? You’re not alone. In today’s digital world, physical checks are far less common, but remain a widely accepted form of payment. Even if you do most of your banking electronically, there may be situations that require pulling out the checkbook.
When the time comes to write a check, it’s important to understand how to do it properly. Otherwise, you may encounter issues such as banking errors, delayed payments, or even potential fraud.
Each check you write is an official document that communicates crucial information to banks. It tells the bank how much to pay, who to pay, and when the transaction was authorized. While the details are critical, there’s no need to feel overwhelmed. Following a simple, step-by-step process can help ensure you don’t miss a thing. In this guide, we’ll provide a check example and break down each step, giving you all the knowledge needed to fill out a check correctly and confidently.
Step-By-Step Guide To Writing A Check
Whether you're brand new to writing checks or just need a refresher, this six-step process explains exactly how to fill out a check so things go smoothly.
Step 1: Date The Check
When filling out a check, the first step is to write the date in the small space in the top right corner.
There are several ways to date a check, and it's a matter of personal preference. Writing the date in a MM/DD/YYYY (06/07/2023) or Month, Date, Year (June 7, 2023) formats are common. For example, a check written on June 7, 2023, would be dated 06/07/2023 or 6/7/2023. Some people prefer to write out the month in words to make it clearer. In that case, the date would be "June 7, 2023".
Step 1: Date the Check

Using the current date helps you and the check's recipient keep accurate records of when the transaction was authorized. In some circumstances, an individual may fill in a future date in the hopes that the bank won’t cash the check until that time. However, this practice, known as post-dating a check, is unreliable. In many cases, the bank will still process a check even if it is post-dated, so it's critical to make sure your checking account has sufficient funds available before providing a check for payment.
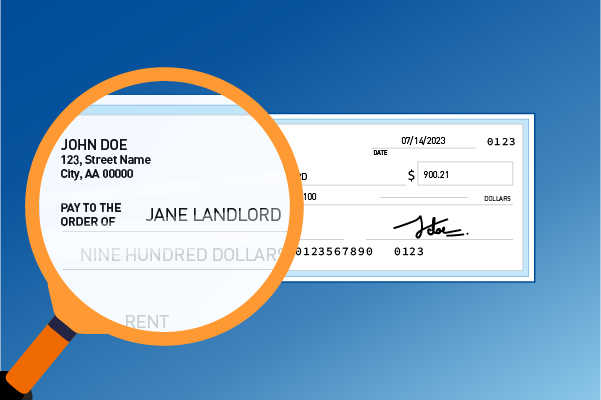
Step 2: Add The Payee Name
The next step is to let the bank know who to pay. Do this by writing the name of the person or organization authorized to cash the check on the line that reads Pay to the order of. This information needs to be accurate since it specifies who can legally cash the check. To avoid any confusion or problems, be sure to spell the payee's name correctly.
This step is essential for several reasons. Not only does it help ensure the check goes to the right place, but it also provides a layer of protection for your money. If a check gets lost or stolen, anyone other than the named payee will likely have trouble cashing it.
When writing a check to two individuals, the way you list their names significantly impacts how the check can be cashed. For example, if you write John or Jane Smith on the payee line, it means that either John or Jane can individually endorse and cash the check. In contrast, if you write John and Jane Smith, both parties must endorse the check for it to be cashed. This subtle change can make a big difference in how your payment is processed, so make sure you use the correct phrasing based on your intention.
Step 2: Add the Payee Name
It’s also possible to write the word Cash on the payee line instead of someone’s name. However, this is generally not advised. When a check is made payable to cash, anyone who gets ahold of it can use it to withdraw funds from your account.
Step 3: Write The Payment Amount In Numbers
On the right-hand side of the check, there’s a box to add the value of the check in dollar and cent amounts using numerals. It's a straightforward step, but attention to detail is critical here.
When filling in the amount, start writing as far over to the left part of the box as possible, as this can prevent anyone from adding extra numbers. For example, when writing a check for $50.00, the 5 should be right up against the left-hand border of the dollar box. Otherwise, someone could easily turn a $50.00 check into a check for another amount, such as $850.00.
Step 3: Write the Payment Amount in Numbers
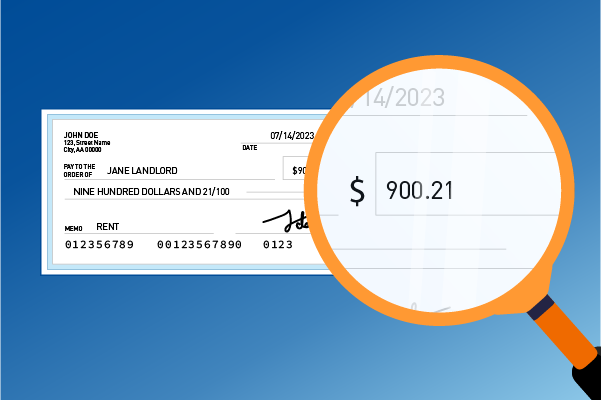
When filling in the box, there’s no need to add an additional dollar sign. Also, make sure to always include two decimal places. For example, instead of writing 50, write 50.00. This can help prevent fraudsters from altering the amount of the check.
Finally, double-check to ensure you've entered the correct number, as mistakes in this area can lead to payment issues.
Step 4: Write The Payment Amount In Words
On the line below Pay to the order of, there's a space to write the payment amount in words. This acts as a form of error-checking. If the numbers in the amount box are unclear, the bank will use what you’ve written to verify the payment amount.
When filling in this information, start at the far left of the line. Write out the amount, then draw a line after the words to fill the remaining space. This can help prevent anyone from adding additional words.
Use clear, legible handwriting to avoid confusion when writing in the check amount. After the dollar amount, add the word dollars to help clarify the amount. If the amount includes cents, write it in fraction form, using the word and to signify the decimal point.
For instance, when writing a check for $50.25, write out Fifty dollars and 25/100. If the check was for $50.00 even, you could write either Fifty dollars or Fifty dollars and no/100.
Step 4: Write the Payment Amount in Words

For larger numbers, write out each word. For example, a check for $1,243.20 would be written: One thousand two hundred forty-three dollars and 20/100.
Step 5: Add A Memo
At the bottom left of the check, there's a line labeled Memo. This is an optional step, but taking the time to fill it out is a good habit. The memo line can help you remember the purpose of the check. For instance, when paying a utility bill, you could write June 2023 Electric Bill in the memo section. Some companies may ask you to add the account number in the memo section to help track payments.
Keeping track of your expenses through the memo line makes it easy to look back at the checks for budgeting or auditing purposes. Completing this step also provides an extra level of detail that could be needed if there is a dispute about the payment in the future. For checks related to business expenses, adding detailed memos can provide a beneficial record during tax season.
Step 5: Add a Memo
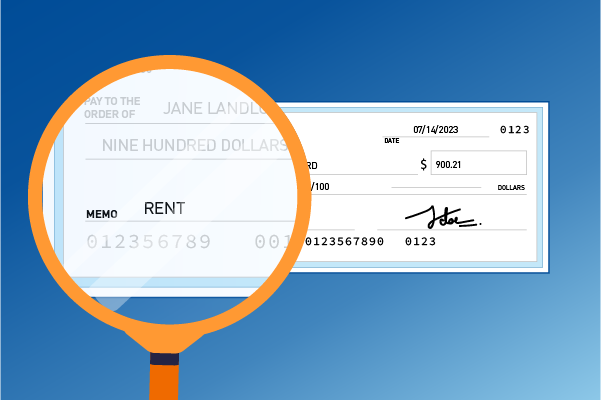
Be careful not to provide too much information. For example, you can avoid adding the full payee account number to the memo space and instead include only the last four to six numbers. This can help protect sensitive information if the check falls into the wrong hands.
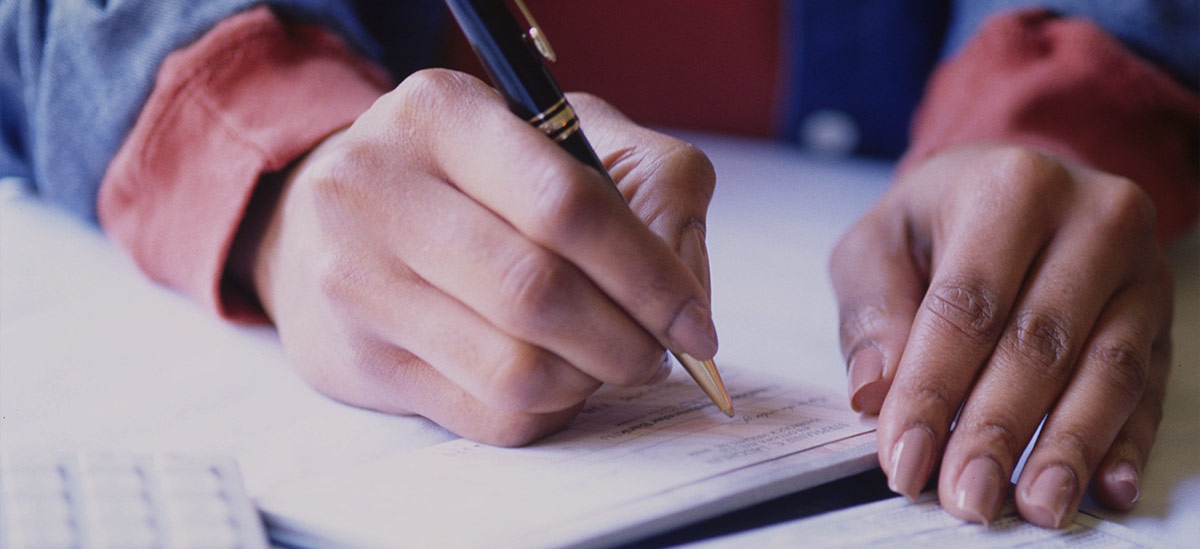
Step 6: Sign The Check
The last step in writing the check is to sign on the signature line in the bottom right corner. The check isn’t valid and can’t be cashed until it is signed, so this is a critical step.
To prevent potential fraud and banking complications, sign your name the same way each time. The bank often compares the signature on the check with the one placed on file when you opened the account, so consistency is key. If the bank rejects the signature because it doesn't match what's on file, you may need to confirm the check's authenticity. This can delay the payment process and might lead to additional work on your end. To avoid these hassles, be sure to sign carefully and legibly.
Step 6: Sign on the Signature Line

Keep in mind that your signature is a vital security feature. Never pre-sign blank checks, and always complete the other details of the check before signing it. This can prevent someone else from filling in the check and cashing it without your knowledge.
Finally, remember that by signing the check, you're authorizing the payment and accepting responsibility for the amount indicated, so make sure all details on the check are correct before adding your signature.
What to Do If You Make an Error When Writing a Check
Mistakes happen. If you inadvertently enter the incorrect amount, misspell a payee's name, or write the wrong date, voiding the check can help avoid confusion. Begin by writing the word VOID across the front of the check. Use an ink pen (Not pencil, for that can be erased) and write in large, clear letters. This prevents recipients from depositing or cashing the check.
To keep accurate records, record the voided check in your checkbook register or finance tracking software, making sure to note that it was voided. Finally, keep the voided check in a safe place in case it's needed for future reference.
After voiding the check, you can issue a new one with the correct information. If the check with incorrect information has already been given to a payee or mailed, contact them promptly to address the error and arrange for a replacement.
Keeping Track of Your Check Payments
Once you’ve written the check, there’s still one more task to complete, and that's balancing your checkbook. While many rely on their online banking to keep track of balances, balancing your checkbook is still a good idea. Some transactions, such as outstanding checks, may not immediately appear in your online history, so reconciling against your monthly bank statement can help avoid overdrafts or missed payments. To keep track of your check payments, follow these steps.
- Record each transaction: Log each check, deposit, or withdrawal in your checkbook register or financial app.
- Review monthly statements: When you receive your bank statement — either in the mail or online — compare it to the checkbook register. Mark off each transaction that appears on both the statement and in the register.
- Account for outstanding checks and fees: Some checks may not have been cashed yet, and fees like ATM charges or service fees may not appear in your checkbook. Be sure to account for any outstanding payments or additional charges.
- Reconcile the balance: Subtract any pending checks or fees from your register. Once adjusted, your checkbook and bank statement balances should match. If they don’t, carefully check your math and verify that all transactions were recorded correctly.
Regularly reconciling your checkbook helps ensure a clear understanding of available funds. It can also alert you to potential issues, such as errors or fraudulent activity, that may not appear in your online banking history in real-time.
Write Your Checks With Confidence
Next time you reach for the checkbook, remember the importance of following the steps outlined above. The details matter, but with some practice, you’ll feel like a check-writing pro in no time.
Don’t have a checking account yet? No problem. PNC Bank offers several checking accounts to meet a variety of needs. If you're ready to learn more, we can help you explore your options today.